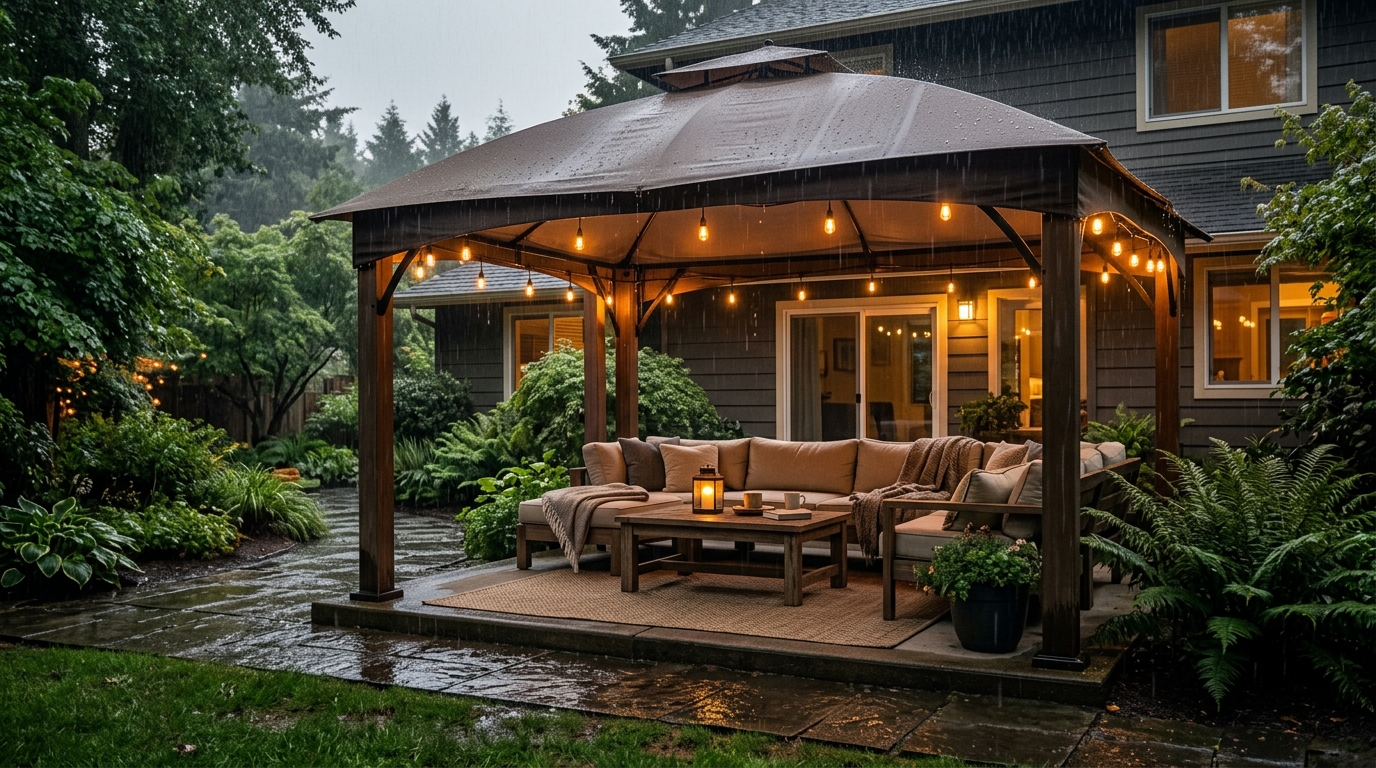
How to Add a Porch Canopy: 13 Stylish Ideas

Stylish Canopy Ideas to Shade Your Entrance
A porch canopy is a roof-like cover that extends over a porch, patio, or front door to block rain, sun, and snow. It can be wood, metal, glass, or fabric, and it adds style, shade, and a welcoming first impression to any home.
These 13 ideas cover canopy ideas for patio shade, front door entrances, modern designs, DIY builds, canopy lights, and Christmas decorations. Each one lists materials, sizes, costs, and safety tips, so you can plan your project, compare styles, and pick the best canopy design for your home.
Measure your entrance first, check local building rules and any HOA requirements, and choose materials that match your climate. Anchor every structure into studs or solid framing. The table below compares cost and time for every idea, so you can shortlist favorites quickly.
| Idea | Cost | Time | Best For |
|---|---|---|---|
| 1. Gable wood canopy | $$$ | 2 days | Cottage and farmhouse homes |
| 2. Modern flat steel canopy | $$$ | A few hours | Contemporary entrances |
| 3. Clear glass entry canopy | $$$$ | 1 day | Dark, north-facing doors |
| 4. Retractable awning | $$$$ | 1 day | Patio shade on demand |
| 5. Sheer curtain panels | $$ | 1 hour | Soft, breezy patios |
| 6. Sail shade | $ | 2 hours | Decks and flexible spaces |
| 7. DIY metal roof canopy | $$ | 1 weekend | Budget builders |
| 8. DIY fabric canopy | $$ | 3 hours | Cabana-style lounging |
| 9. Pergola-style canopy | $$$ | 1 to 2 weekends | Climbing vines and shade |
| 10. Canopy lights | $ | 1 hour | Evening ambiance |
| 11. Christmas decorations | $$ | 2 hours | Festive entrances |
| 12. Plants and lanterns | $ | 1 hour | Year-round styling |
| 13. Size, slope, and mounting | $ | 1 hour planning | Every installation |
Porch Canopy Ideas for Front Door Entrances
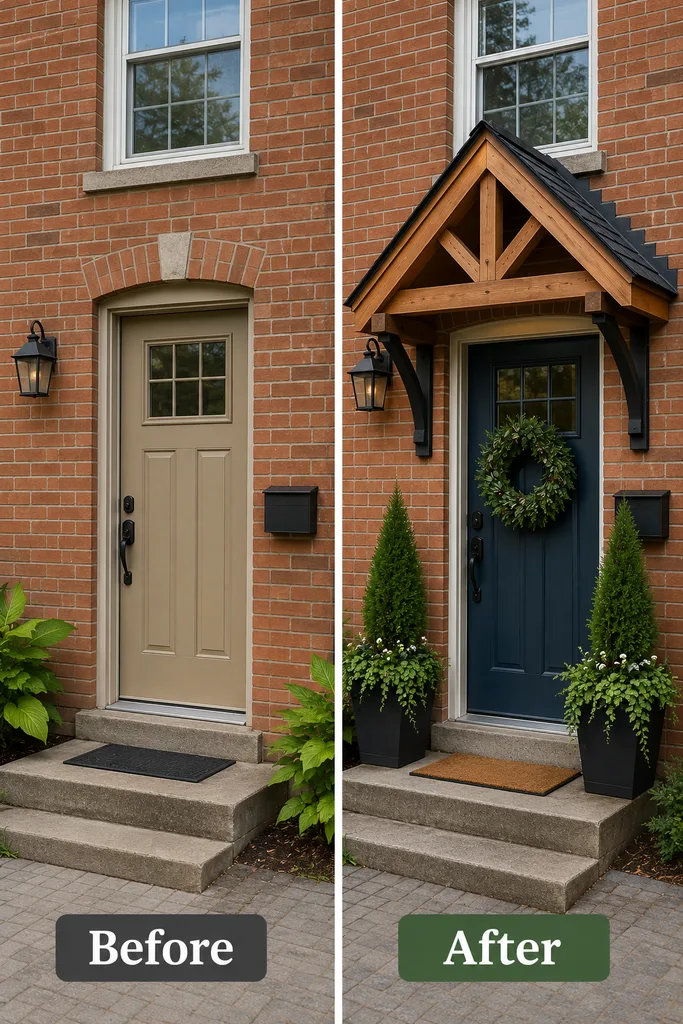
1. Frame the Front Door With a Gable Wood Canopy
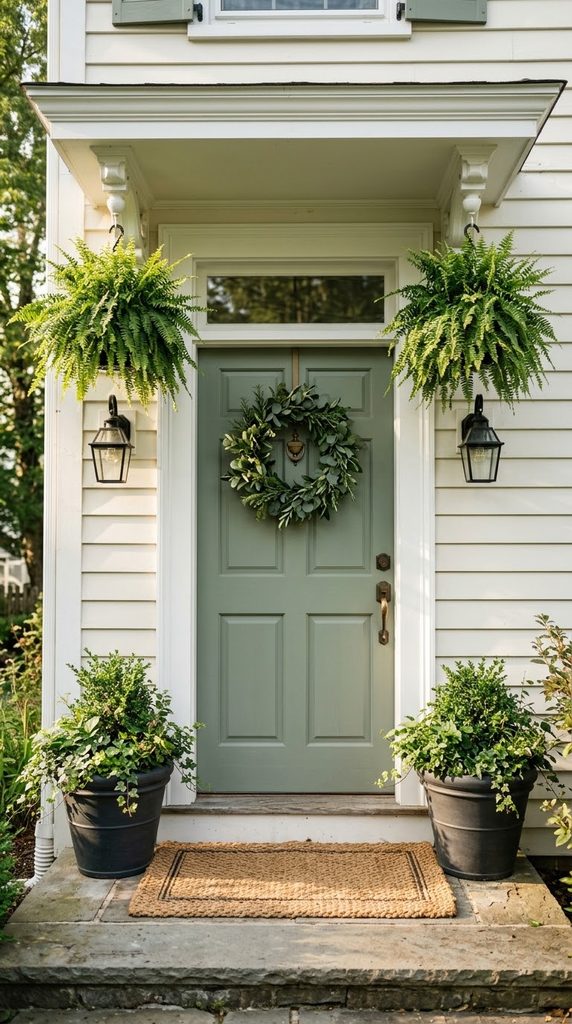
A gable-style wood canopy frames the front door like a small roof and instantly adds character. Cedar or painted pine brackets support a peaked roof covered in shingles or metal, creating a classic entry that suits cottage, farmhouse, and traditional homes beautifully.
Plan the canopy to extend 36 to 48 inches from the wall and to be wider than the door by at least six inches on each side. Add a slight slope so rain runs off instead of pooling on the roof. Flashing seals the wall joint.
Match the roofing to your house for a seamless look. Asphalt shingles blend with most roofs, while standing seam metal gives a crisp, modern edge. Paint brackets and trim in the door color or a contrasting black for added definition. Wide brackets look sturdier.
Expect two days of work and 300 to 1,200 dollars, depending on materials. Mount the frame into wall studs with lag screws, and seal every joint with exterior caulk. Hire a carpenter if your siding is brick or stone. Drill pilot holes first.
2. Choose a Sleek Modern Flat Steel Door Canopy
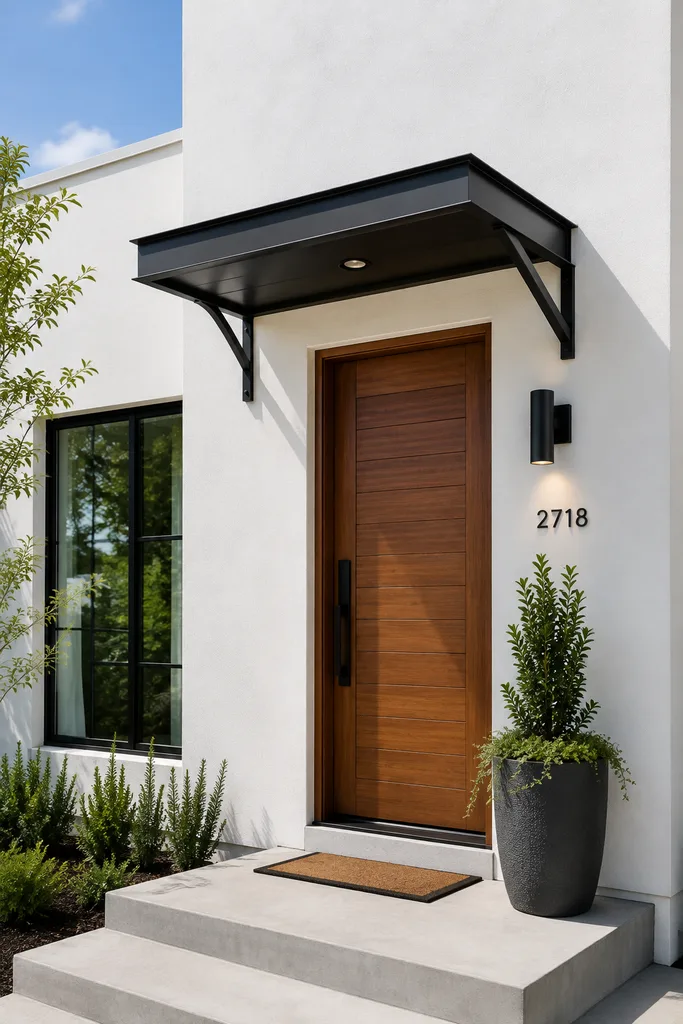
A modern flat canopy in black steel and glass gives a front entrance clean lines and strong architectural presence. It suits contemporary, mid-century, and minimalist homes, and it keeps the door area dry without adding visual bulk or heavy trim around the opening.
Choose powder-coated steel or aluminum, which resists rust and holds color for years. Slim angled brackets keep the structure light, and a slight tilt of about two degrees away from the wall lets rain drain safely toward a gutter or splash area.
Pair the canopy with a bold front door in navy, forest green, or warm wood tone. Add black house numbers, a slim sconce, and a simple planter for a pulled-together entrance. Keep the palette limited so the lines stay crisp.
Prefabricated kits often cost 400 to 1,500 dollars and install in a few hours. Check the weight rating, especially in snowy regions, and follow the manufacturer’s anchoring instructions exactly. Wipe the metal twice a year to prevent dirt buildup and water spots.
3. Let Light In With a Clear Glass Entry Canopy
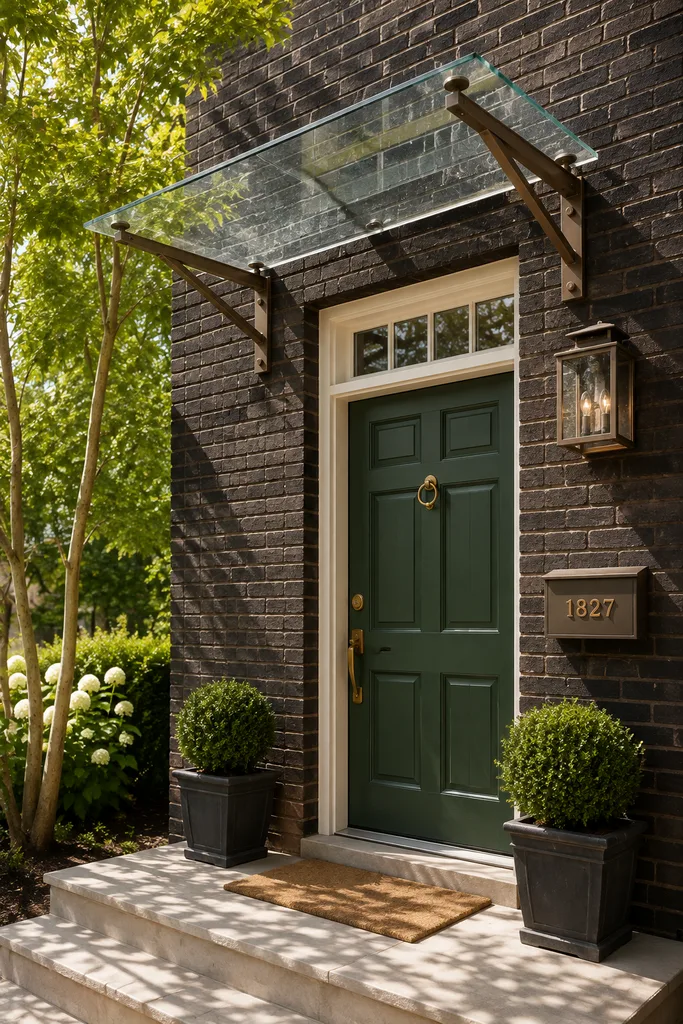
A clear glass or polycarbonate canopy protects the door while letting daylight flow into the entry. It is a smart choice for dark front porches, north-facing homes, and any entrance where a solid roof would feel heavy or block a window.
Tempered or laminated glass is the safest glass option, while twin-wall polycarbonate is lighter, cheaper, and impact resistant. Choose panels with a UV coating so they do not yellow, and use an aluminum or steel frame that supports the weight properly.
Keep the design simple with black or bronze brackets and a gentle slope. A clear canopy shows leaves and dirt more quickly, so plan a rinse with a garden hose every month. Add a gutter edge if water drips onto walkways.
Budget about 500 to 2,500 dollars, since glass costs more than polycarbonate. Hire a pro for glass installation, because panels are heavy and fragile. Check your local code, since some areas require tempered or laminated glass overhead for safety. Leave a small gap for expansion.
Patio Shade Canopy Ideas for Outdoor Comfort
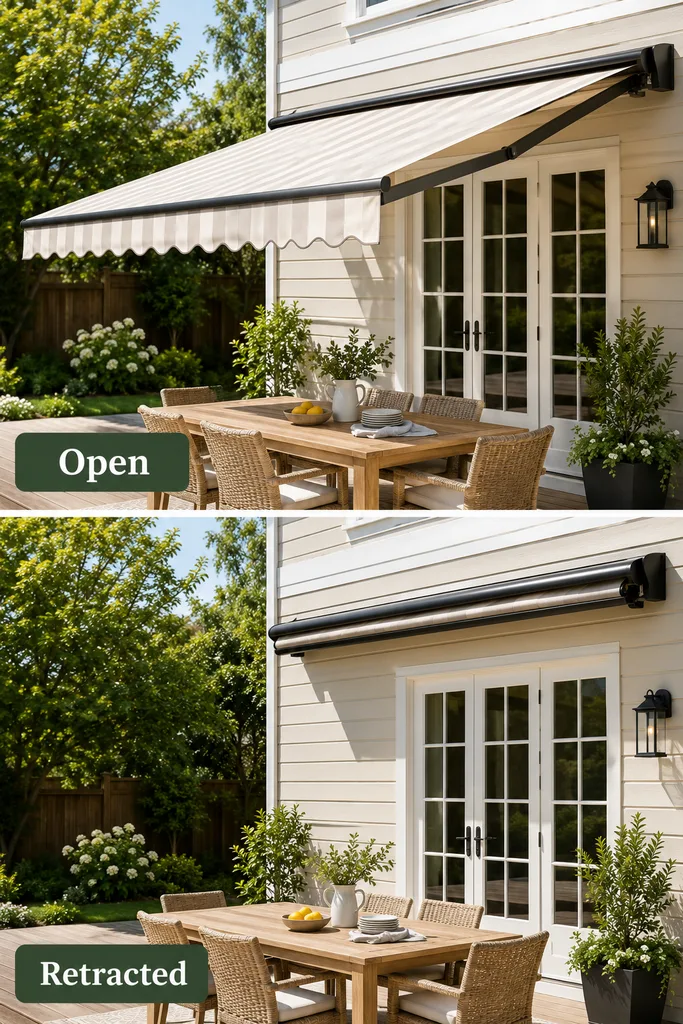
4. Install a Retractable Awning for Patio Shade
A retractable awning gives patio shade on demand, which is ideal if you want sun in cooler months and cover in summer. Fabric rolls out over the seating area and folds back against the house when you do not need it.
Choose solution-dyed acrylic fabric, which resists fading, mildew, and moisture better than basic polyester. Stripes in cream, navy, or sage feel classic, while solid gray looks modern. Measure the projection carefully, since most patio awnings extend between eight and thirteen feet from the wall.
Add a wind sensor or retract the awning during storms and strong gusts, because open fabric can act like a sail. Mount the bracket into solid framing, never plain siding. A small shade valance adds a custom finish at the front edge.
Manual models can start around 500 dollars, while motorized versions often cost 1,500 dollars or more before installation. Clean the fabric with mild soap and water twice a year, and let it dry fully before rolling it back to prevent mildew.
5. Hang Sheer Curtain Panels for Soft Canopy Shade
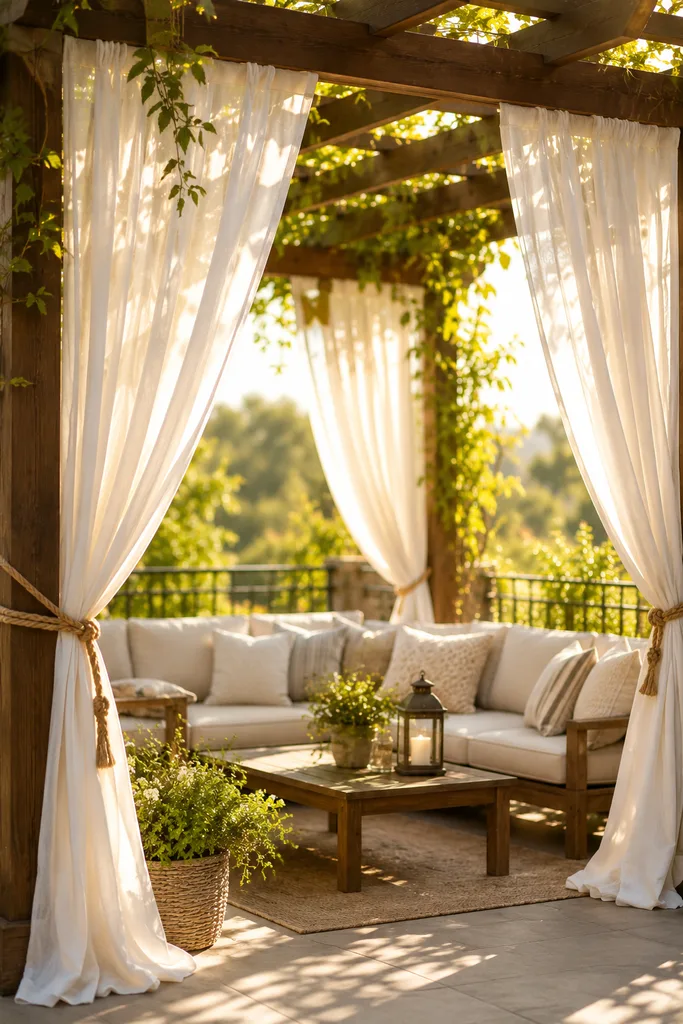
Sheer outdoor curtains turn a covered patio into a soft, breezy retreat. Hang panels from a pergola beam or a ceiling-mounted rod, then tie them back with rope or ribbon so sunlight filters through in a gentle, flattering glow.
Choose outdoor-rated fabric labeled UV and mildew resistant, because indoor sheers fade and rot quickly. Panels about two feet wider than the opening look full and luxurious. Use stainless steel curtain rings and rods so rust never stains the cloth.
Add weights or tiebacks to stop panels from whipping around in wind. Neutral white, cream, and soft gray shades feel calm, while terracotta or sage panels add color. A curtain rod across both ends frames seating beautifully for evening dinners.
Expect to spend 60 to 250 dollars per set of panels, plus hardware. Take panels down before storms, and machine wash on gentle when they get dirty. Hang them on the shaded side of the patio so they last longer. The effect feels relaxed and resort-like.
6. Stretch a Sail Shade Over Your Seating Area
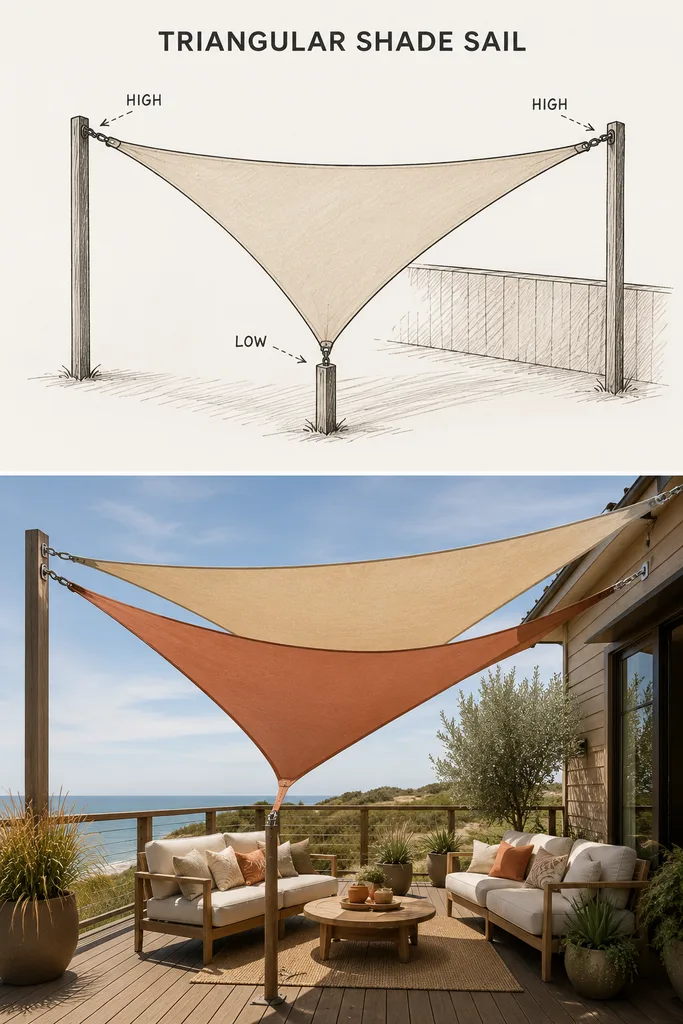
A triangular or square sail shade stretches over seating like a modern, sculptural roof. It is lightweight, affordable, and flexible, which makes it a favorite for patios, decks, and spaces where a permanent structure is not an option. Setup is simple enough for beginners.
Attach each corner to a post, wall, or fascia using stainless steel hardware, and keep the sail at an angle so rain runs off. Position at least one corner lower than the others. A taut fit prevents pooling and flapping.
Choose breathable HDPE fabric that blocks up to about 90 percent of UV rays and still lets heat escape. Layer two sails in coordinating colors for dimension, such as sand and terracotta. Add string lights along the edges for evening ambiance.
Sails cost roughly 50 to 300 dollars, plus posts if you need them. Check hardware every season, since tension loosens over time. Remove the sail during heavy wind or snow, and store it dry to prevent mildew and fading. Pick UV-stabilized fabric for longer life.
DIY Canopy Ideas You Can Build This Weekend
7. Build a DIY Porch Canopy With a Metal Roof
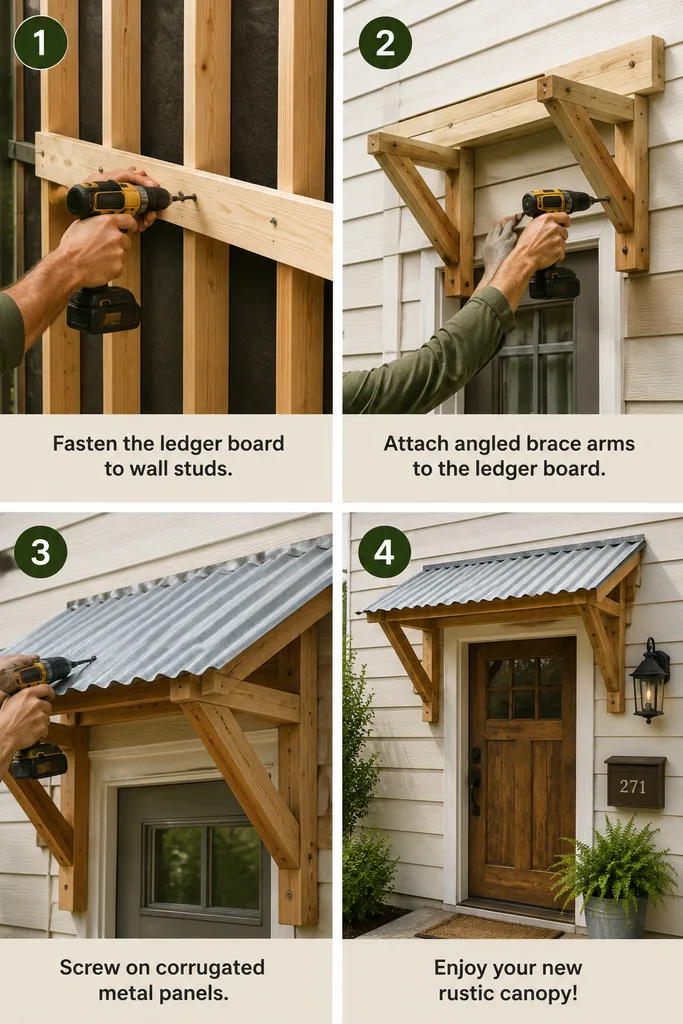
A DIY wood canopy with a corrugated metal roof is one of the most budget-friendly ways to protect a door. Basic lumber, brackets, and metal panels create a rustic, farmhouse look you can build with a drill and a saw in a weekend.
Cut a pressure-treated ledger board and fasten it to wall studs with lag screws. Attach two angled brace arms, add rafters spaced about 16 inches apart, and screw the metal panels on with rubber-washered screws. Slope the roof one inch per foot.
Stain the wood in a warm tone, or paint it to match the trim. Add a drip edge along the front so water does not run back under the panels. Black metal brackets give the frame a sturdy, vintage character.
Materials usually cost 150 to 450 dollars. Wear safety glasses and gloves when cutting metal panels, and use a stable ladder with a helper. Ask your building department whether a permit is required before you start, especially if you attach to the house.
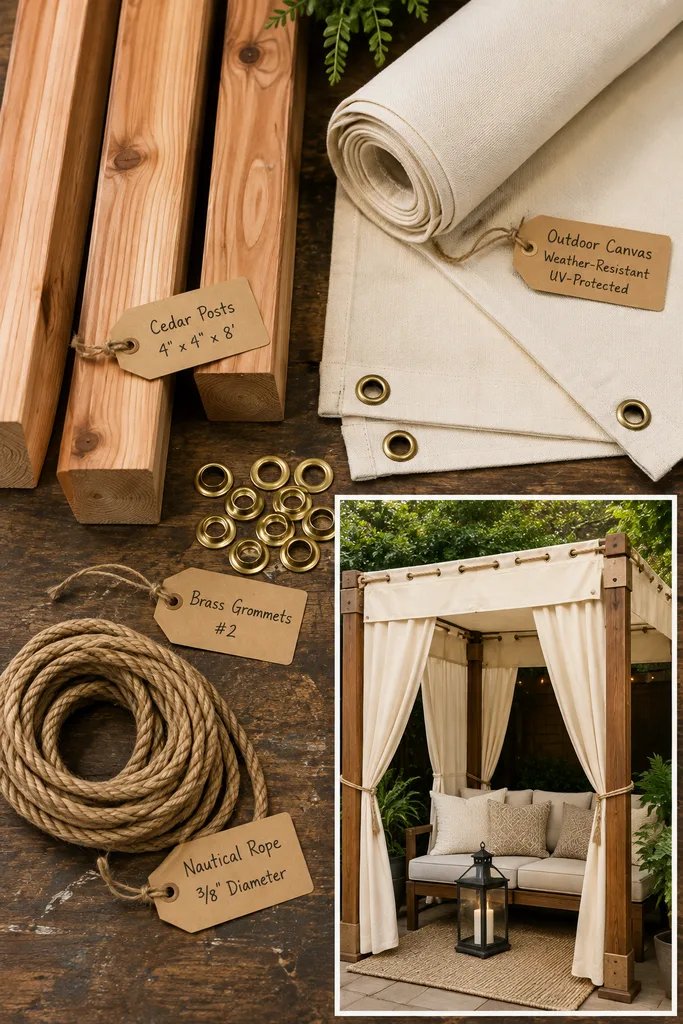
8. Make a DIY Fabric Canopy From a Simple Frame
A DIY fabric canopy from a simple frame offers instant patio shade without heavy construction. Four posts or a pre-built metal frame support a tightly stretched piece of outdoor fabric, creating a cozy, cabana-style space for lounging or dining. It is a great weekend project for beginners.
Build the frame from cedar posts, galvanized pipe, or electrical conduit bent with a conduit bender. Stretch outdoor canvas or acrylic fabric across the top, and fasten it with grommets and rope. Keep the fabric slightly angled to shed rain.
Stitch or glue hems to prevent fraying, and add grommets every 12 inches for secure tie-downs. Use stakes or weighted bases to keep the frame stable. Natural linen-look fabric in cream or sand feels relaxed and coastal. Double-stitched seams last longer in strong sun and wind.
Plan about three hours and 80 to 250 dollars. Never use a flimsy frame in windy locations. Take the fabric down in storms, wash it with mild soap, and dry it fully before storing it for winter. Use sandbags on posts for extra stability on windy days.
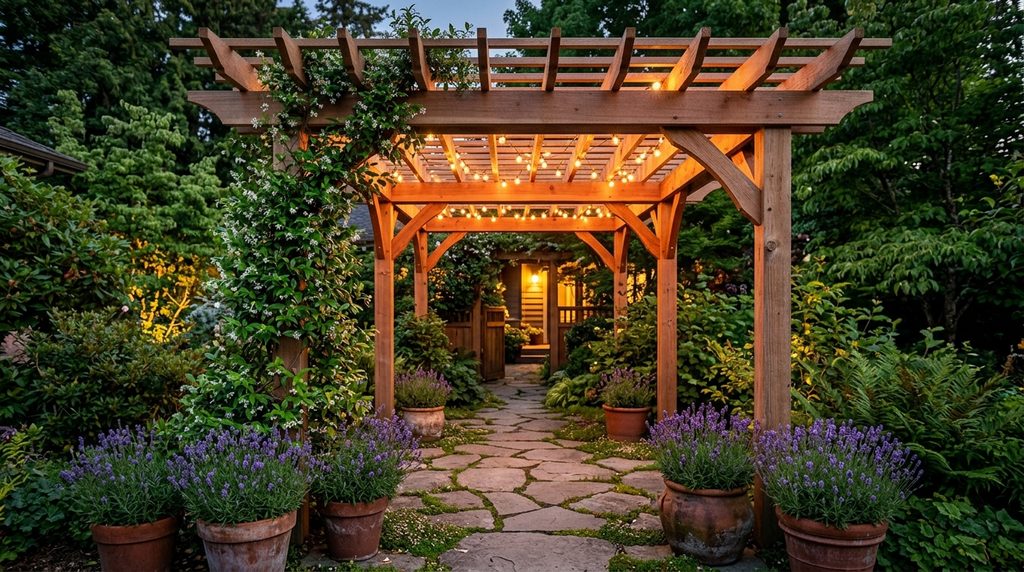
9. Craft a Pergola-Style Canopy From Cedar Boards
A pergola-style canopy adds structure and shade with open rafters, which can support climbing vines, sheer fabric, or a retractable shade. Cedar boards create a sturdy frame that ages beautifully and works on porches, patios, and entry walkways. It also gives lights a place to hang.
Use four-by-four posts anchored into concrete footings or post bases, and span them with two-by-eight beams. Space cross rafters about 12 inches apart for partial shade. Pre-drill holes, and use galvanized or stainless screws that resist rust. Level every post before tightening the final bolts.
Grow clematis, jasmine, or wisteria over the top for natural shade that changes with the seasons. Add a sheer fabric panel or a slatted cover for stronger sun protection. Paint or stain the wood to match your siding. Vines may take a season or two to fill in.
Expect 400 to 1,500 dollars for lumber and hardware, plus a weekend or two of work. Call 811 before digging footings to avoid buried lines. Check local height and setback rules, because attached structures often need a permit. Stain the wood within a few weeks to protect it.
Canopy Lights, Christmas Decorations, and Decor
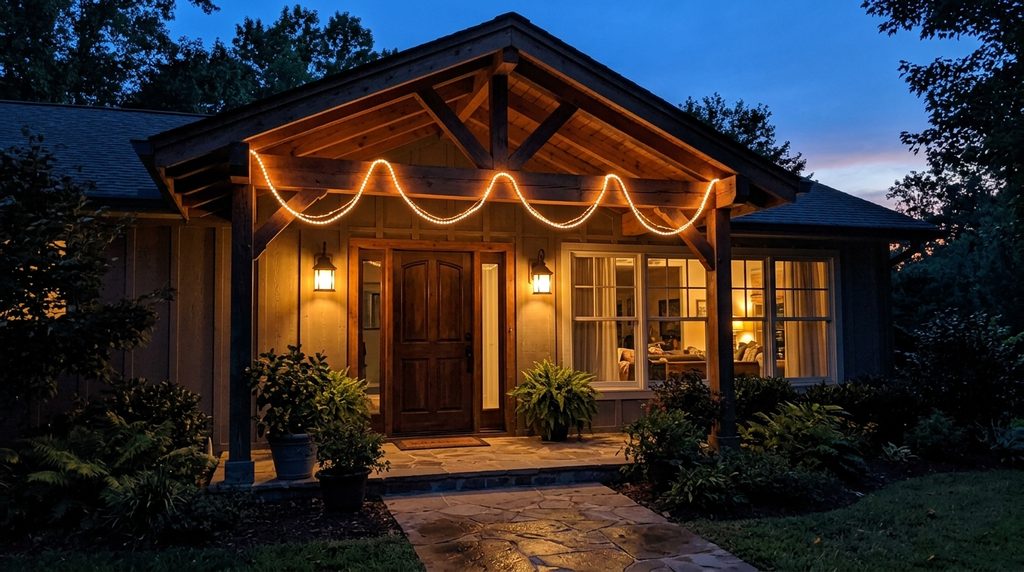
10. Add Canopy Lights for a Warm Evening Glow
Canopy lights turn an entrance into a warm, welcoming evening scene. Drape string lights along the front edge, wrap rope lights around posts, or install recessed soffit lights that wash the area in soft, even light and improve safety on steps.
Choose warm white LED bulbs rated for outdoor use, around 2700 Kelvin, for a cozy glow. Use clips, hooks, or a guide wire to hang strands, and never staple cords. Space bulbs about 12 to 24 inches apart for even coverage.
Add a dimmer or smart plug so the lights follow a schedule. Solar-powered strands work in sunny spots, but plug-in strings give brighter, steadier light. Hide cords in a conduit or along the fascia so the design looks clean. Warm schedules save energy and add convenience.
Plan one hour and 20 to 80 dollars for strings and clips. Use a weatherproof outlet cover and a GFCI outlet for safety. Check strands for damage each year, and replace any with cracked sockets before hanging them. Keep a spare strand in case one section fails.
11. Trim the Canopy With Christmas Decorations
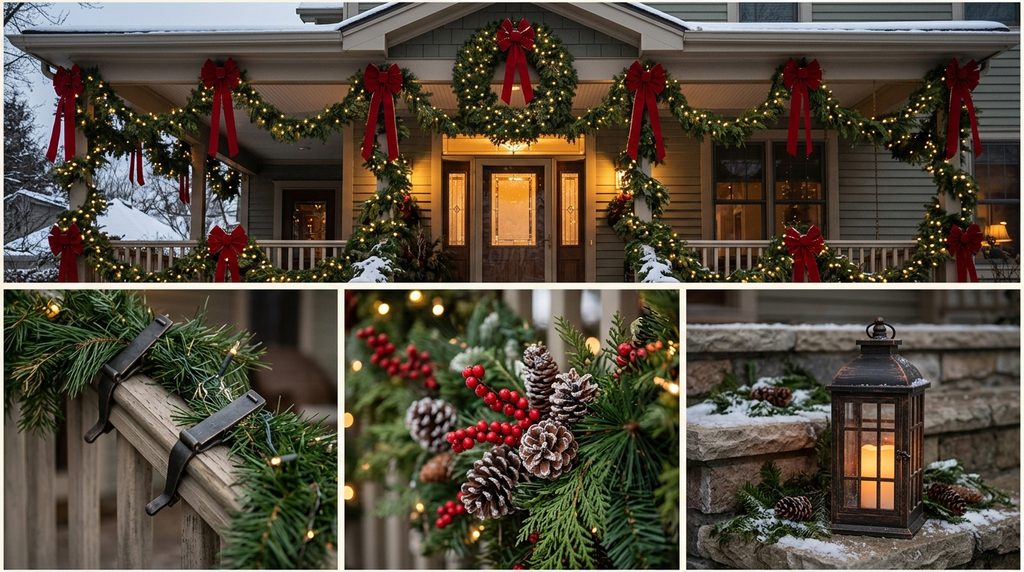
A canopy is the perfect frame for Christmas decorations. Drape evergreen garland across the front edge, hang a large wreath above the door, and add lights, bows, and ribbon to create a festive entrance guests notice from the street. It transforms a plain entry into a holiday highlight.
Secure garland with outdoor-rated clips or wire along the beam, and use removable hooks for ribbon and ornaments. Mix real or faux cedar with pinecones, berries, and eucalyptus for texture. Weave warm white lights through the greenery before adding decor.
Choose a simple palette, such as red and cream, gold and green, or black and white, for a clean look. Hang lanterns with LED candles at different heights. A bold velvet bow at each corner ties everything together. Repeat colors to keep the display cohesive.
Allow about two hours and 40 to 150 dollars. Use outdoor-safe extension cords, keep greenery away from heat, and remove decorations soon after the holidays. Store garland flat or coiled in bins to keep shape for next year. Test every light strand before climbing the ladder.
12. Style Canopy Decor With Plants and Lanterns
Everyday canopy decor makes an entrance feel finished. Hang baskets of ferns or trailing ivy, place lanterns along the edge, and add a wreath on the door to give the structure a lived-in, welcoming personality that suits every season. Small details make a big visual difference.
Use sturdy hooks screwed into beams, and check the weight rating for every hanging basket. Ferns thrive in shade, while petunias and geraniums like sunnier spots. Add a durable doormat and two matching planters to anchor the entrance. Choose weather-resistant planters that drain well.
Change the look each season with pumpkins, mums, and gourds in autumn, then explore these fall front porch decor ideas for more styling inspiration. Swap in evergreen stems for winter and bright flowers for spring. Seasonal swaps keep the entrance fresh without major expense or effort.
Plan about one hour and 30 to 120 dollars. Water hanging baskets often, since they dry quickly in wind. Choose coated chains or hooks that will not rust, and move plants inside during frost or extreme heat. Rotate plants occasionally so each side gets even light.
How to Choose and Install the Right Canopy
13. Pick the Right Size, Slope, and Mounting
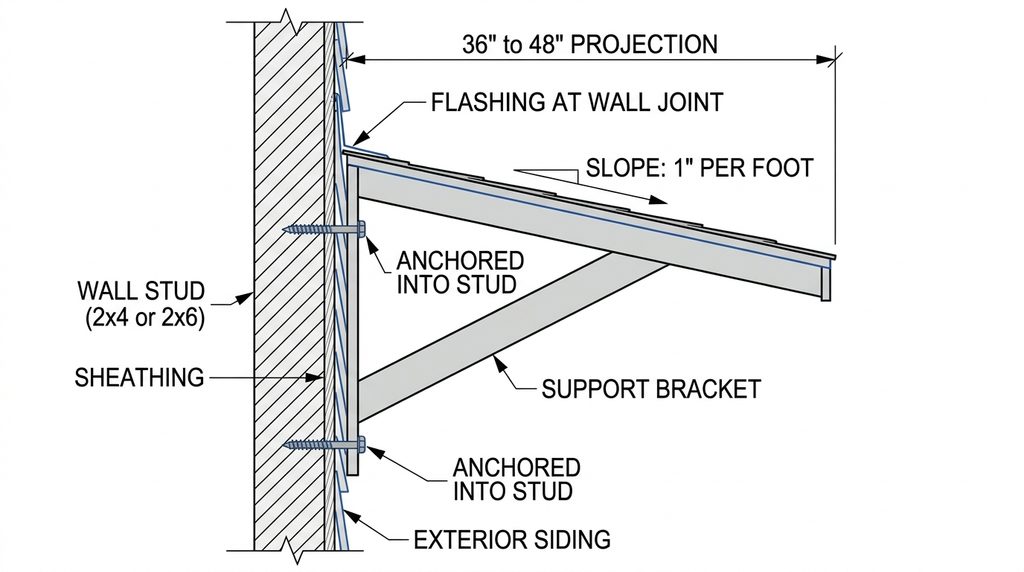
Getting the size right makes every canopy look intentional. Measure the door width and add at least six to twelve inches on each side, then plan a projection of 36 to 48 inches so visitors stay dry while unlocking the door.
Slope matters for drainage. Aim for roughly one inch of drop per foot of projection, and add flashing where the frame meets the house. Without flashing, water can leak behind siding and rot the wall, which is expensive to fix later.
Mount into studs or solid framing, never just into siding or brick veneer. Use galvanized or stainless fasteners, and add diagonal braces for stability. In snowy areas, choose a design rated for heavy snow load, and check local wind requirements.
Before buying, confirm any HOA rules and permit needs, and mark utilities, light fixtures, and gutters on a sketch. Take photos of your entrance and draw dimensions on them, which helps you compare designs and order the right size. Careful planning prevents costly mistakes during installation.
Canopy Questions Homeowners Ask Most Often
What Is the Best Canopy for a Front Porch?
A gable-style wood or powder-coated metal canopy usually works best, because it sheds rain and snow quickly and matches most home styles. Choose a design that suits your roofline, and make sure it is wide enough to cover the door and a small standing area.
How Far Should a Door Canopy Extend Out?
Most door canopies extend 36 to 48 inches from the wall, which covers the doorway and gives visitors room to stand dry. Make the canopy at least as wide as the door plus six to twelve inches on each side for balanced protection.
Do You Need a Permit to Add a Door Canopy?
Often yes for permanent structures, especially if the canopy attaches to the house or changes the roofline. Rules vary by city, and HOAs may add requirements. Call your local building department before you build, and ask about size limits, setbacks, and load requirements.
What Material Lasts Longest for a Canopy?
Powder-coated aluminum, galvanized steel, and cedar last longest with basic care. Polycarbonate panels resist impact and let light through, while acrylic fabric suits seasonal shade but needs cleaning and replacement sooner. Choose materials rated for your local wind, sun, and snow conditions.
Can You Hang Christmas Lights on a Canopy?
Yes, if you use outdoor-rated LED strands and secure them with clips or hooks made for outdoor use. Avoid nails and staples that can damage wires. Keep plugs off the ground, use a weatherproof outlet cover, and unplug lights during storms.
How Much Does a Door Canopy Usually Cost?
Costs vary widely. A DIY wood canopy may cost around 150 to 500 dollars, while prefabricated metal or glass models often run from several hundred to a few thousand dollars before installation. Get multiple quotes and include permits, flashing, and finishes in your budget.
Final Thoughts on Planning Your Entry Canopy
Adding a porch canopy is one of the simplest upgrades for style, shade, and weather protection. Start with the size and mounting plan, then choose a material and finish that match your home. Add lights and seasonal decor last so the structure stays timeless.
Check local rules, anchor every frame securely, and use outdoor-rated lights and fabrics. Safety always comes before style. Which of these 13 canopy ideas will you try first? Share your favorite in the comments and pin your best entrance makeover to Pinterest.